Aligns with Your Goals
Custom metrics ensure your AI evaluation directly reflects your business objectives, whether it’s improving customer service, content quality, or any other area.Accurate Assessments
Tailored KPIs provide precise, relevant insights, avoiding the limitations of generic metrics that may not capture the nuances of your data.Actionable Insights for Better Decisions
Custom metrics give you clear, actionable feedback, enabling quick improvements to AI performance based on what matters most to your business.Continuous Optimization
Flexibility to adjust thresholds and criteria ensures ongoing improvement, keeping AI performance aligned with evolving business needs.Efficient Bulk Evaluation
Evaluate large datasets quickly and accurately, saving time while maintaining high-quality assessments.Data-Driven Growth
Granular feedback helps identify strengths and weaknesses, supporting informed decisions that drive AI and business growth. This guide will walk you through the steps of using Custom Eval Metrics to perform a detailed and personalized evaluation of your datasets.Step-by-Step Instructions: Evaluating using Custom Eval Metrics
Step 1: Upload Your Dataset
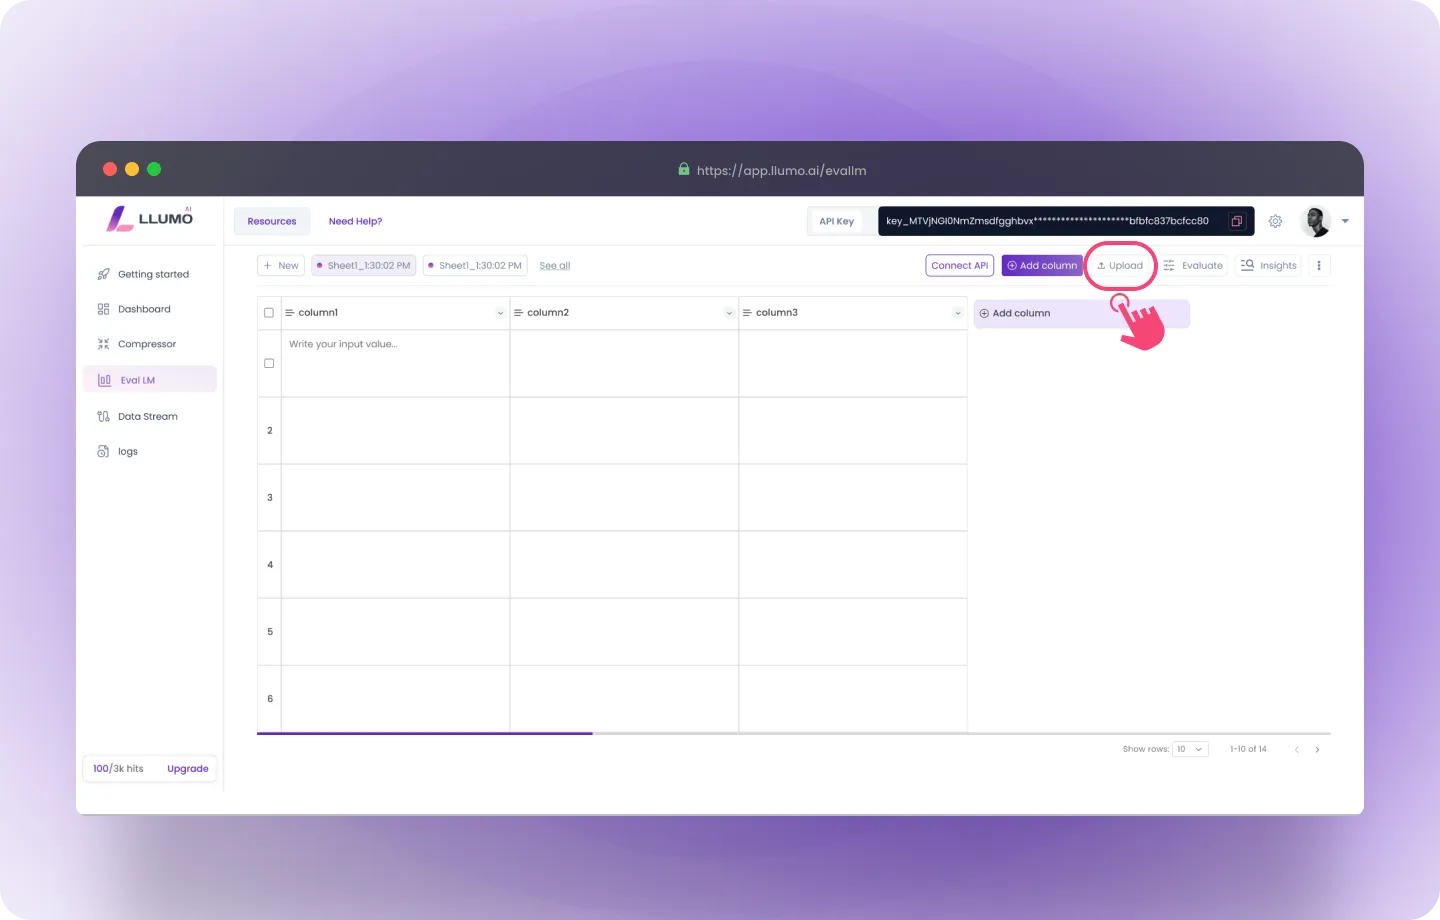
Option 1: Upload File
- Log into the LLUMO AI Platform and go to the “Evaluate Dataset” section.
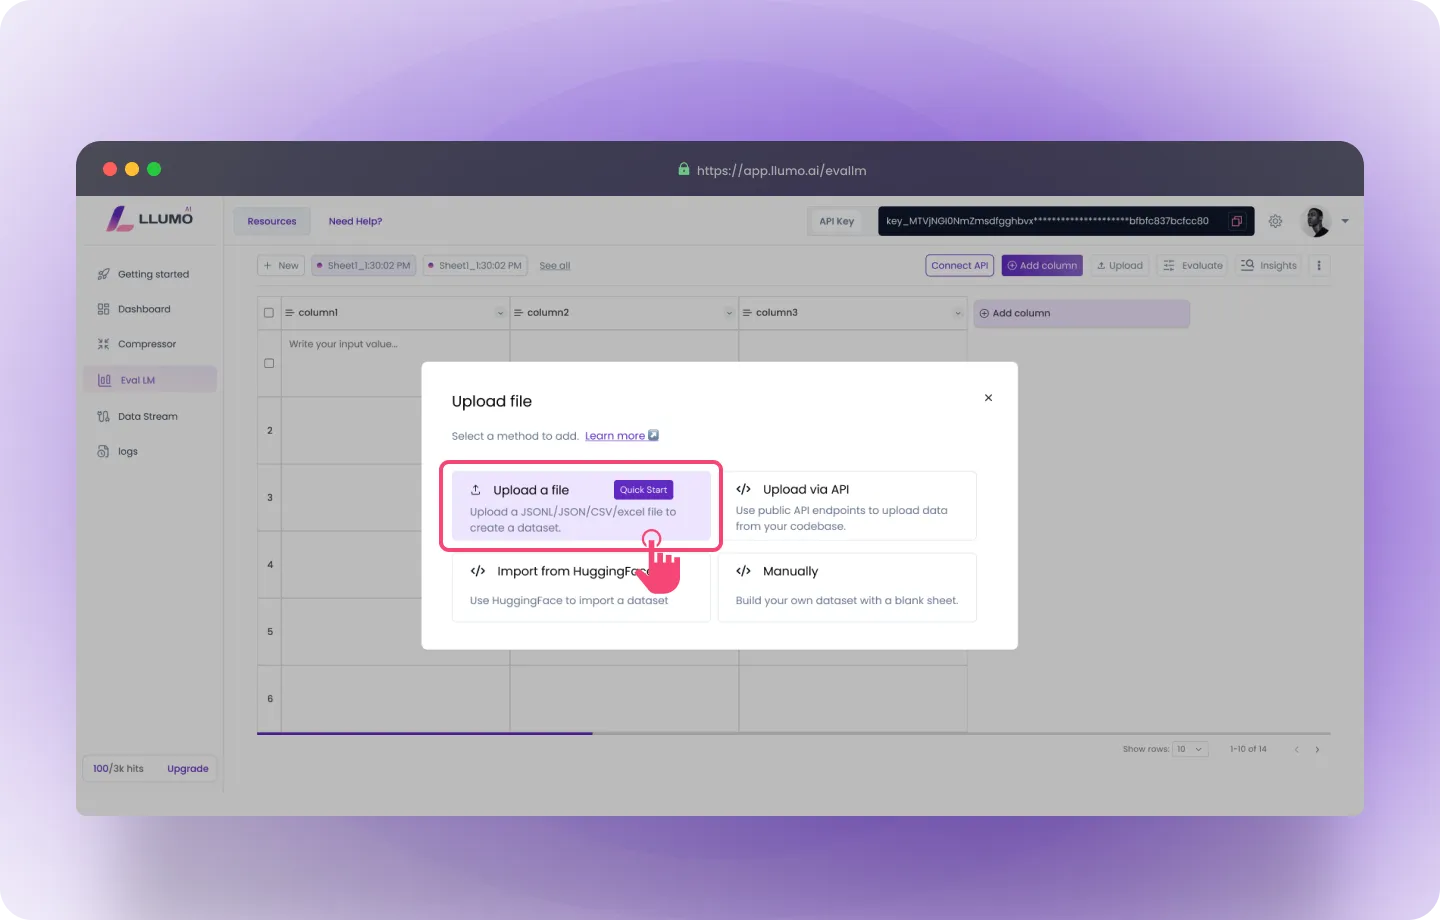
- Click “Upload File” and select your dataset. The file can be in CSV, JSON, or Excel format.
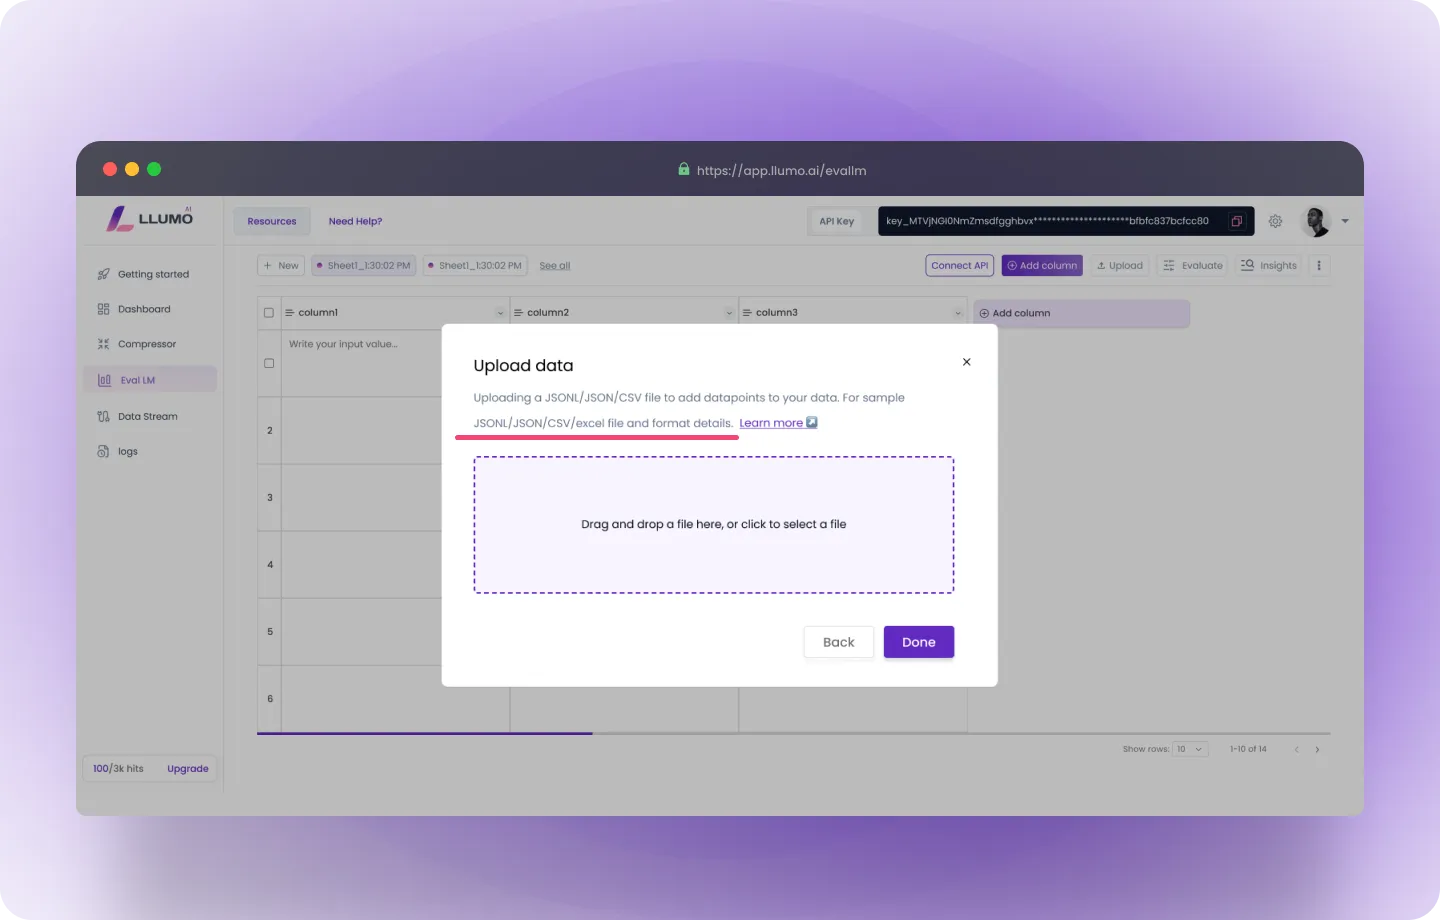
- Review Your Data: A preview of the uploaded data will be displayed. Ensure that the file is structured correctly and the data looks accurate before proceeding.
Option 2: Upload via API
- Access the API Documentation: Visit LLUMO’s API documentation for the exact endpoint and parameters.
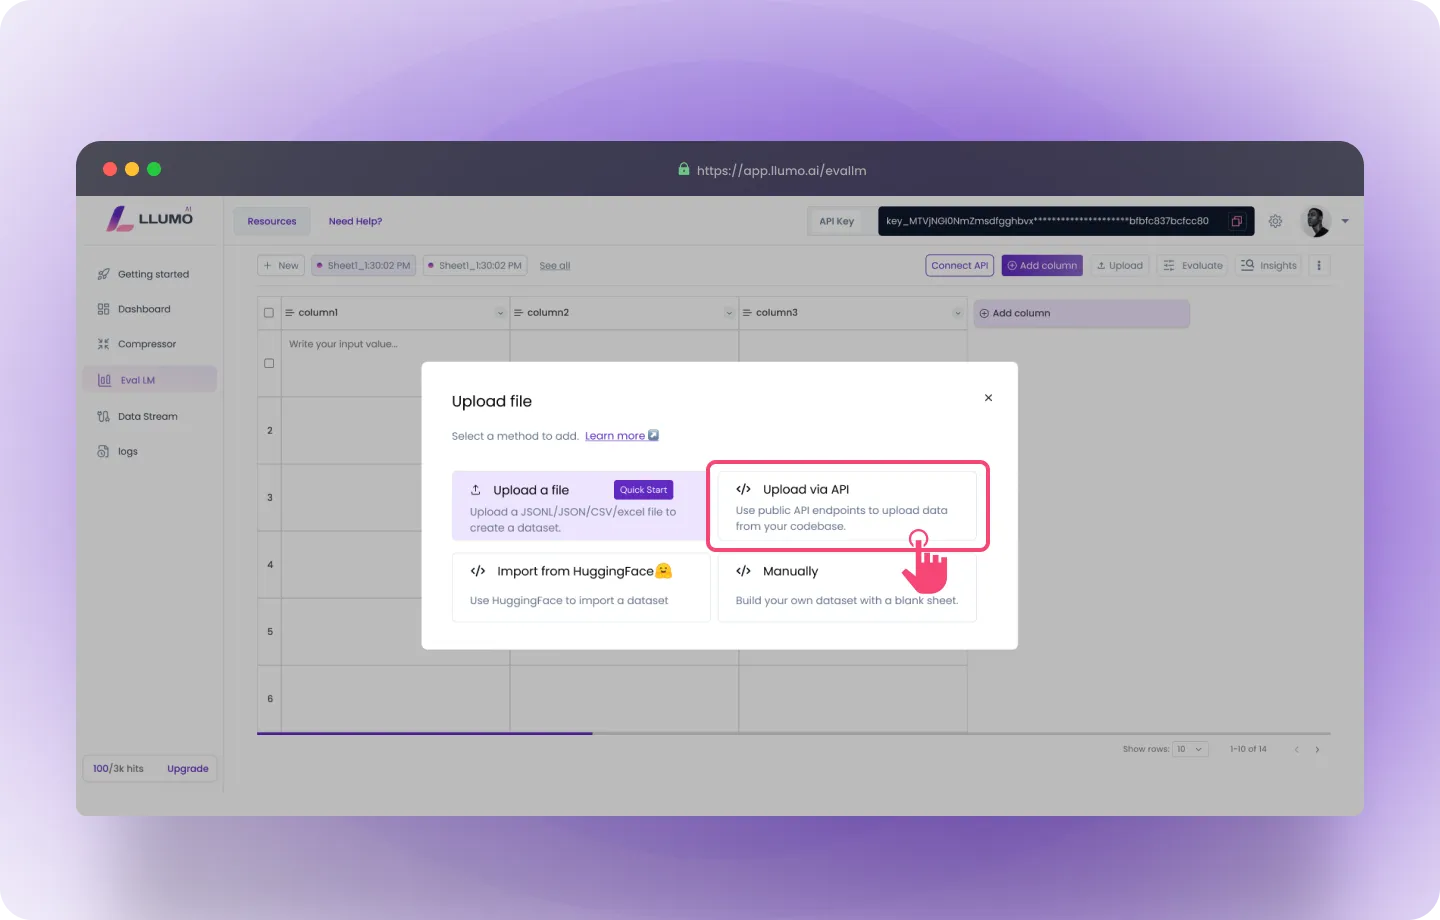
- Upload Your Dataset: Make an HTTP request to the API to upload your file.
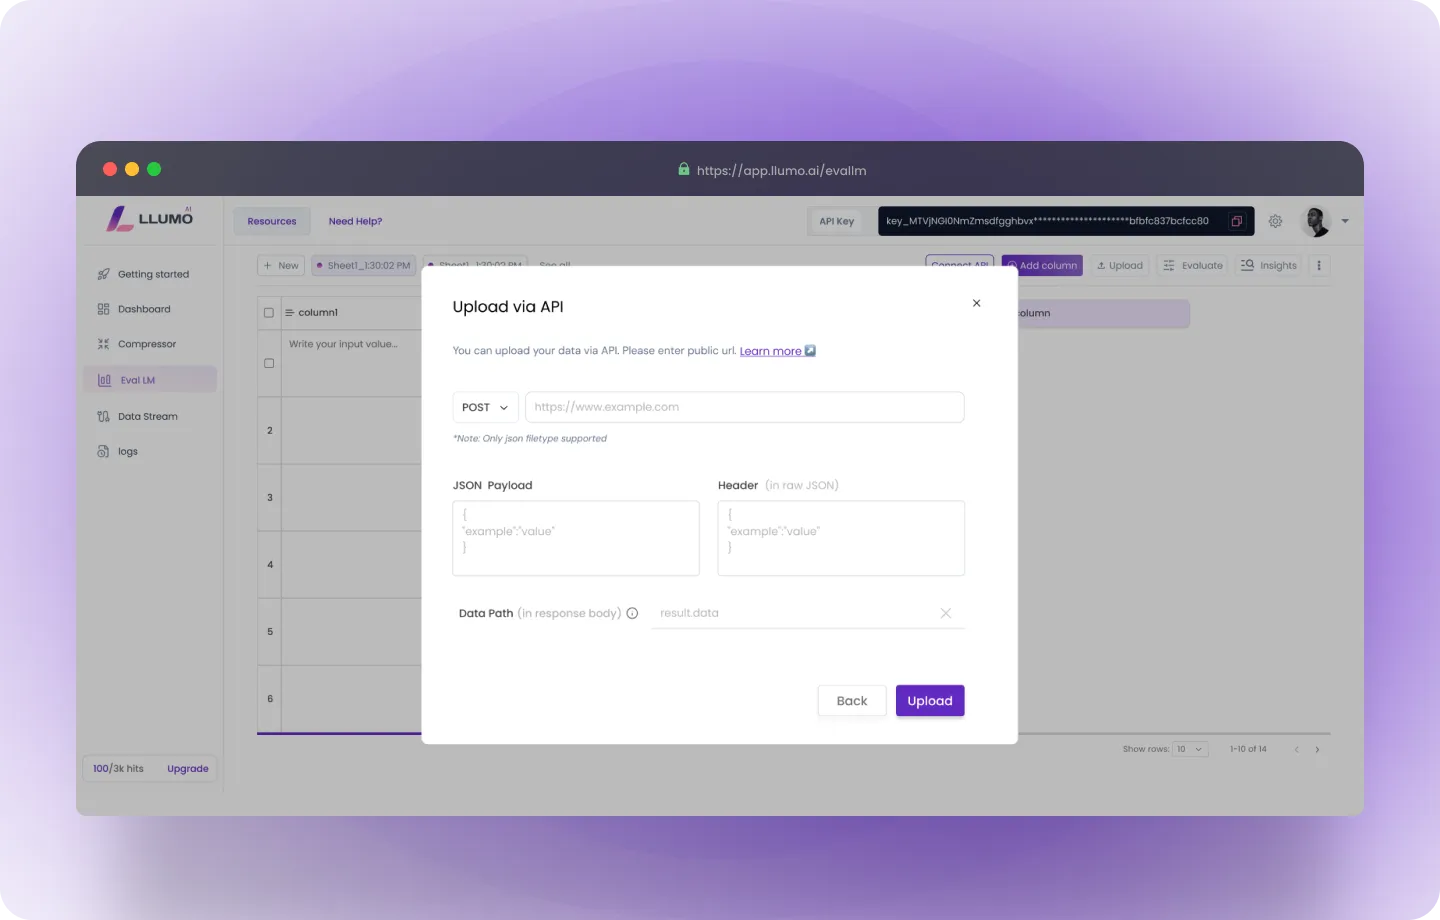
- Confirm the Upload: Once the upload is complete, you’ll receive a confirmation response, and the data will be ready for evaluation.
Step 2: Go to Prompt
Here, you can follow these steps:- Write Prompt: Enter your prompt by providing the desired query or instruction to guide the AI model in generating the results you expect.

- Create a Smart Prompt: Refines your written prompt, making it more specific and detailed to generate more accurate and focused results.
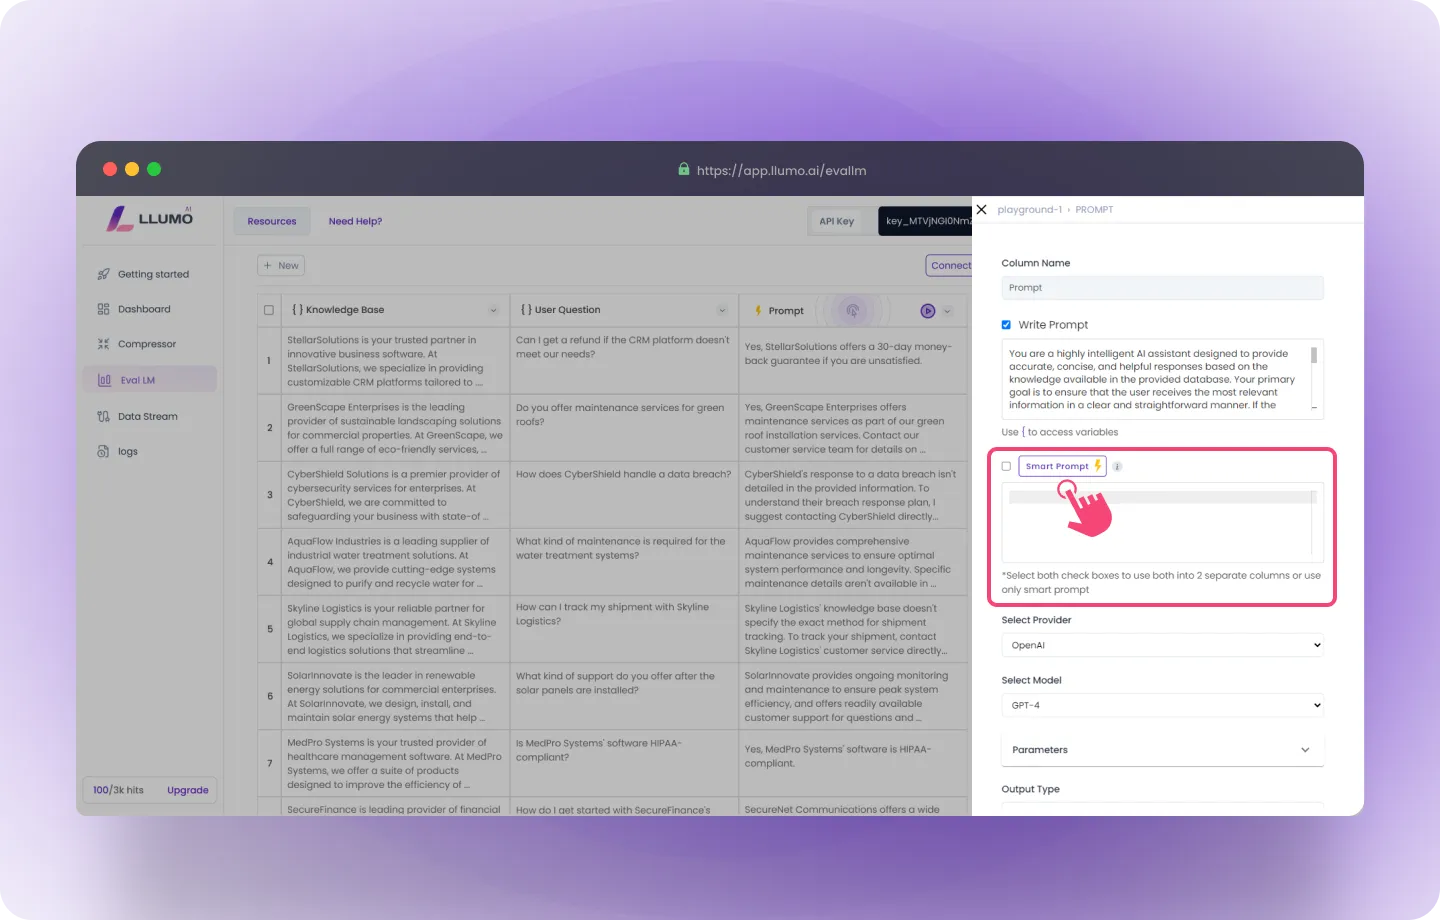
- Select Your LLM Provider: Choose your preferred provider from the drop-down list (LLUMO supports multiple LLM providers).
- Choose the Model: Select the specific AI model you want to use for generating the results, based on your needs.
- Adjust Parameters: Fine-tune the model’s parameters to match your requirements and improve output precision.
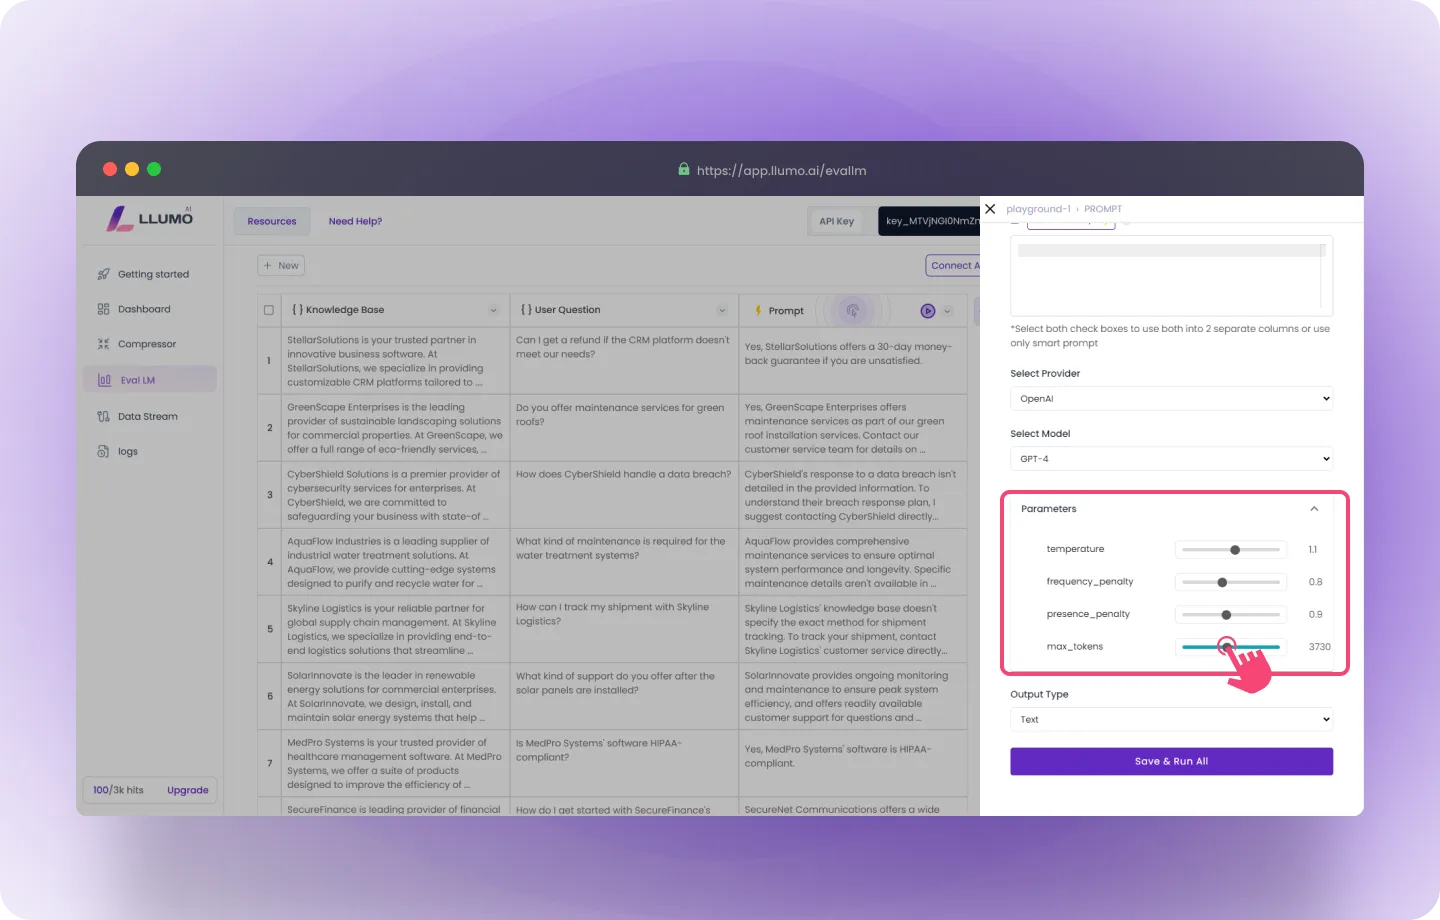
- Select Output Type: Choose the type of output you want for the generated results.
Step 3: Run the Prompts to Generate Outputs
- Once the dataset is uploaded, initiate the process to run the prompts and generate outputs.
- Allow the system to complete processing your prompts.
- Once the outputs are ready, proceed to the evaluation step.
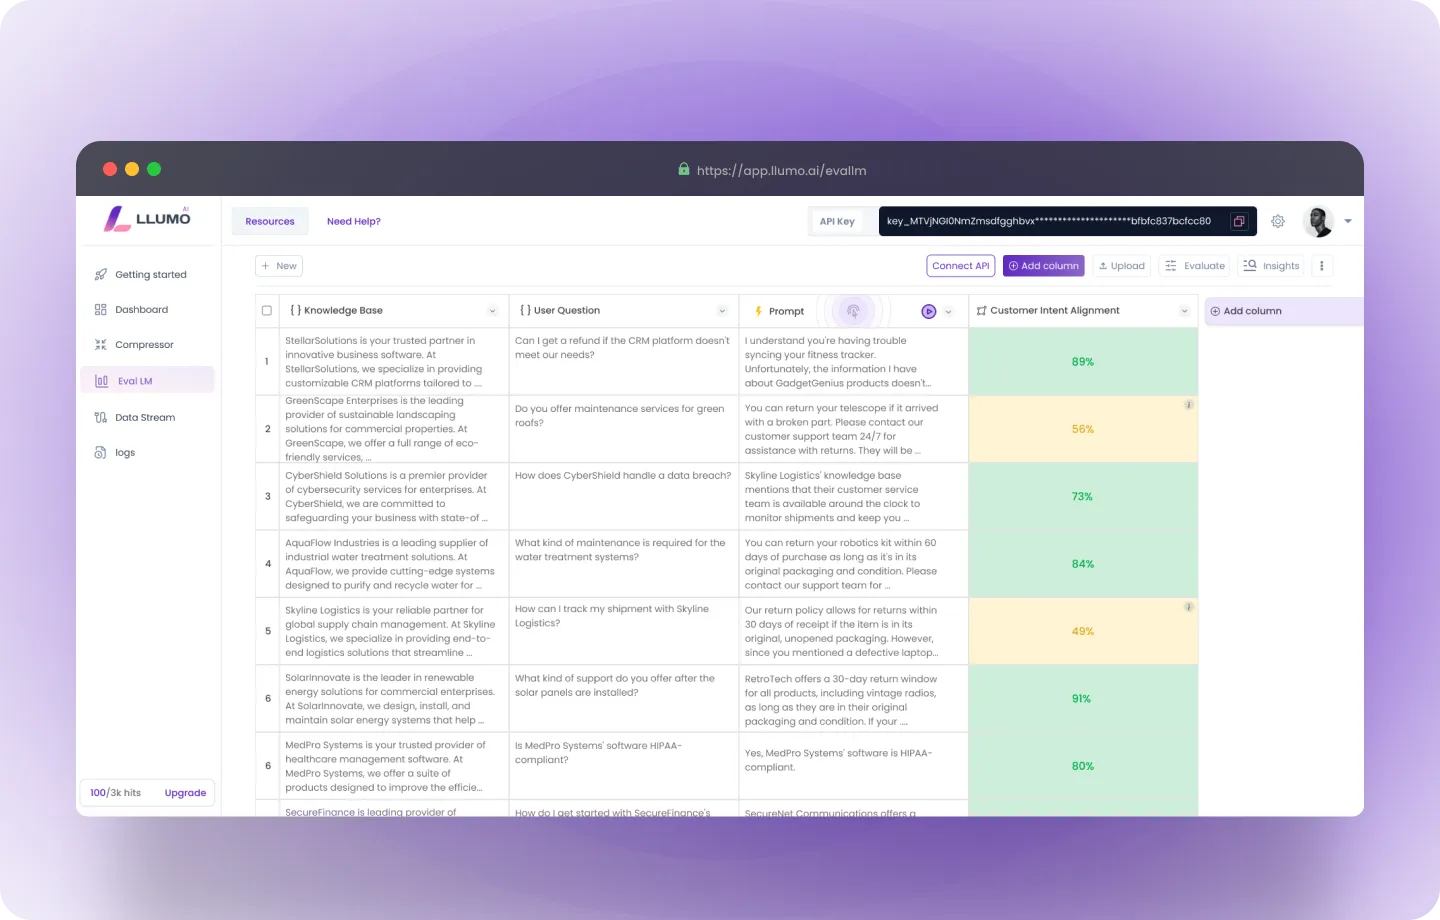
Step 4: Custom Evaluation
- Go to the “Create Column” section.
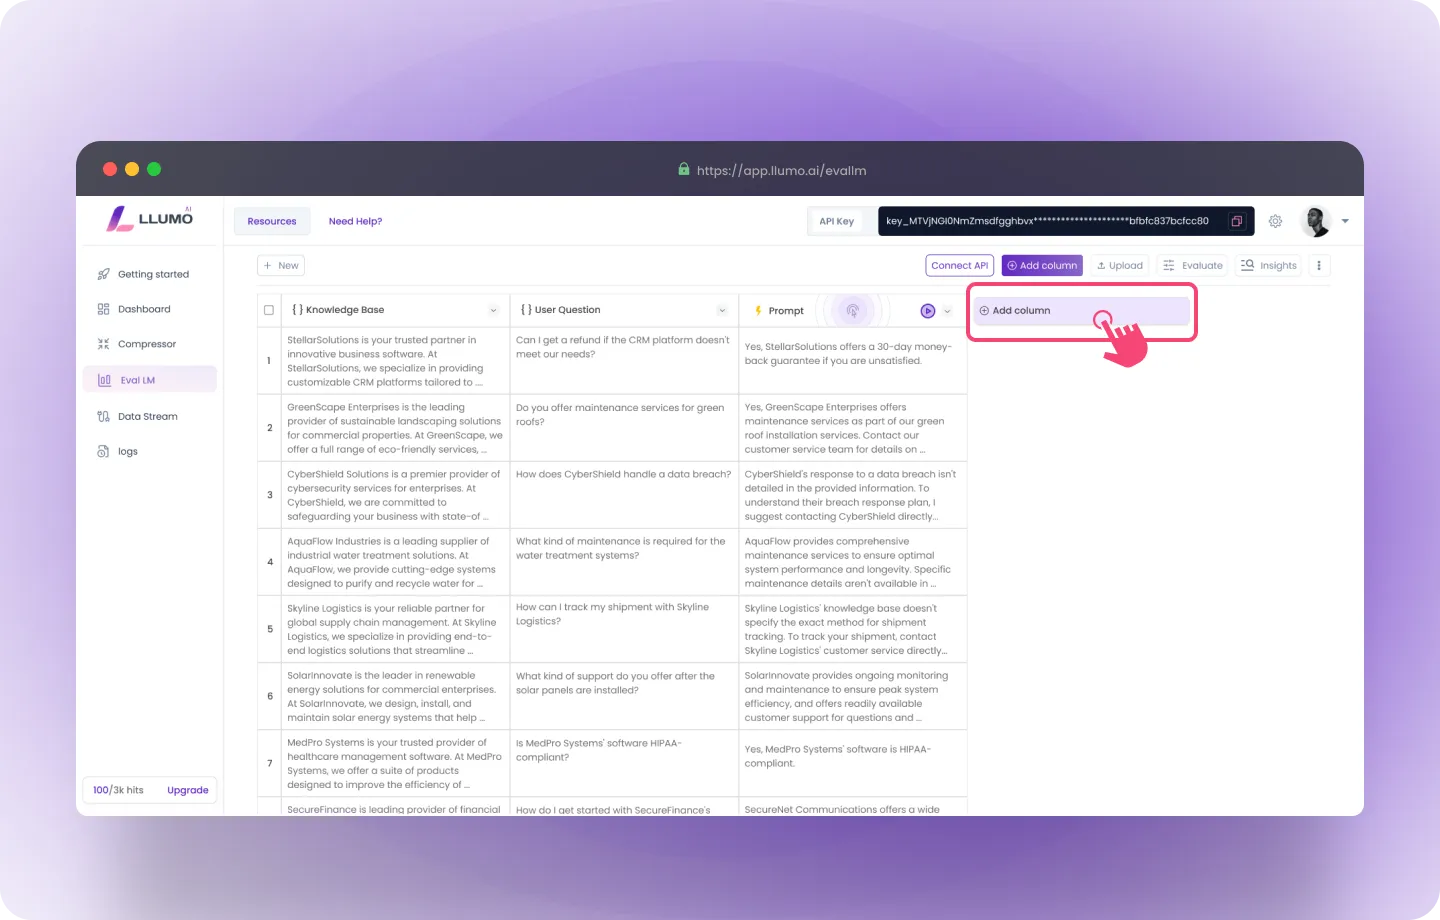
- Select the “Custom Evaluation” option.
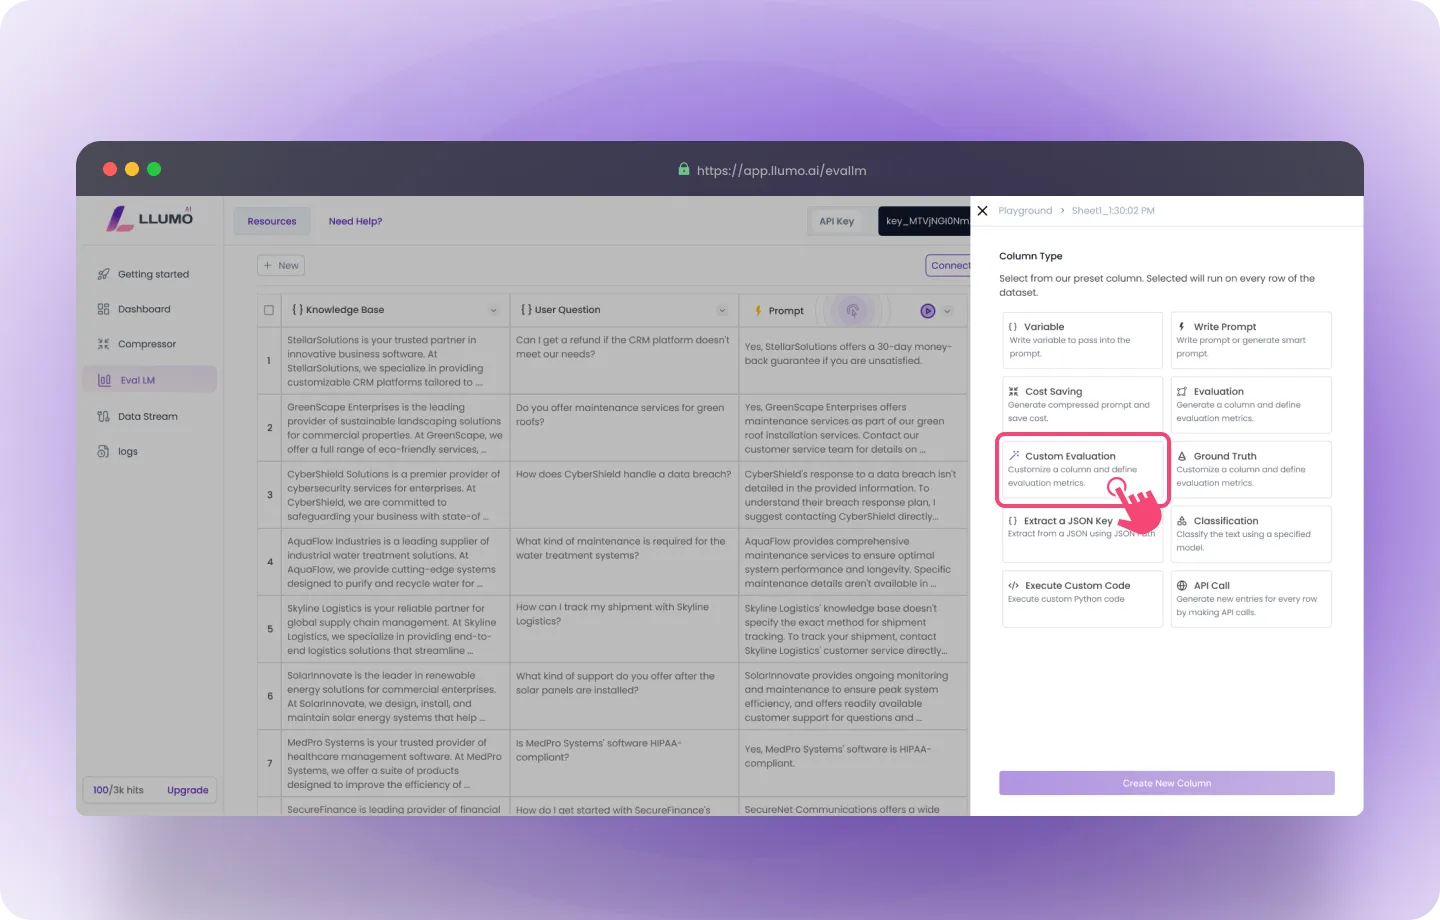
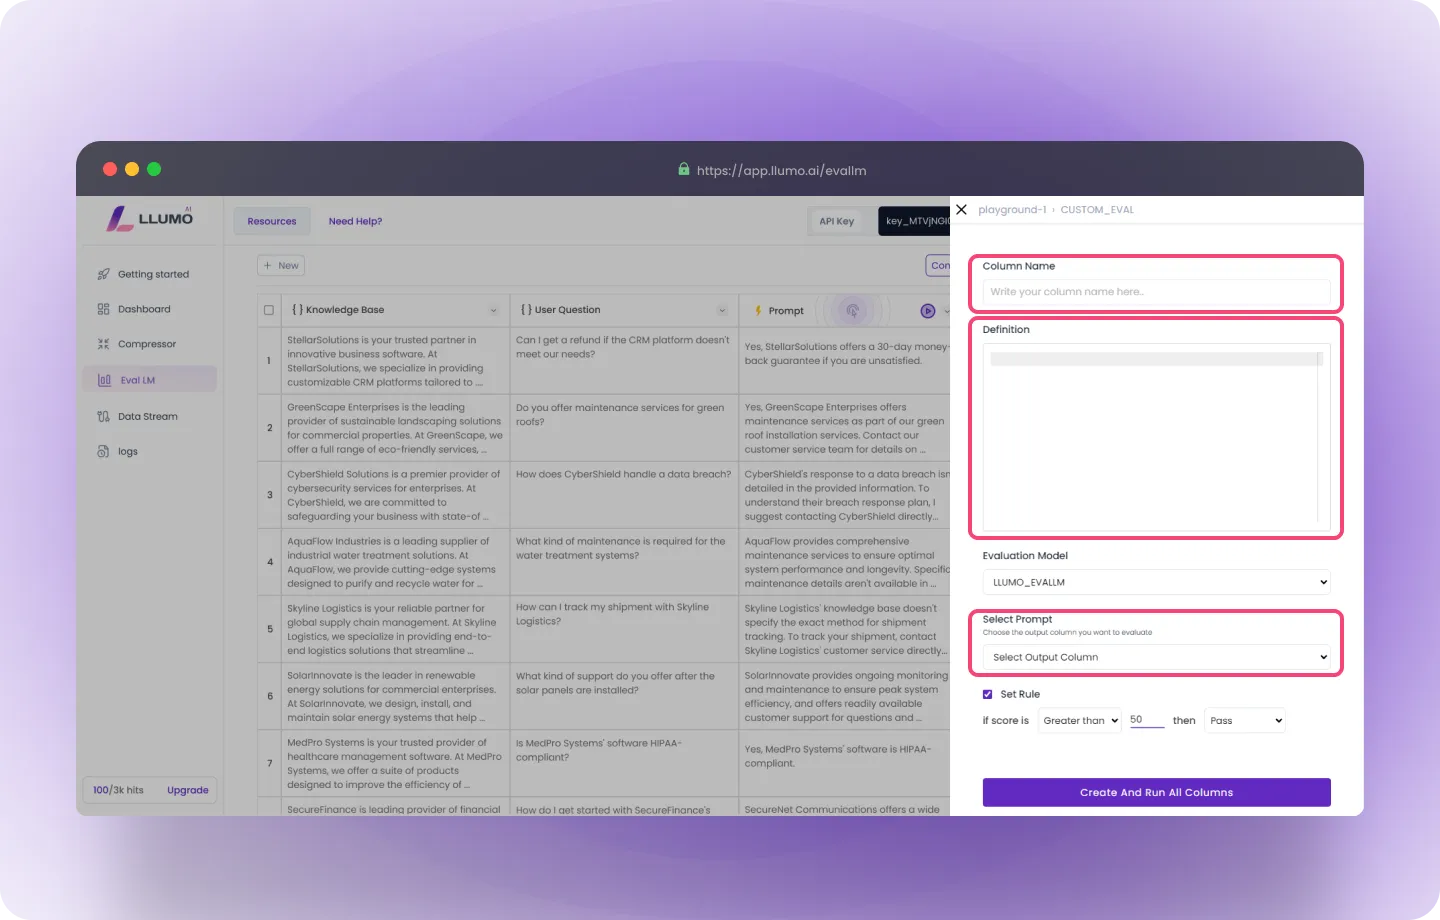
- Here, you can create custom evaluation metrics by specifying a column name, defining the evaluation criteria, and selecting the prompt or output to assess. You can also create multiple custom evaluation metrics to evaluate different aspects of your data.
- Once you’ve entered all the details, it will appear like this. In this example, I’ve created a custom metric called Customer Intent Alignment (CIAS). Definition: CIAS measures how well the company’s response aligns with the customer’s intended goal or request, based on AI-driven analysis of both the customer’s inquiry and the company’s response.
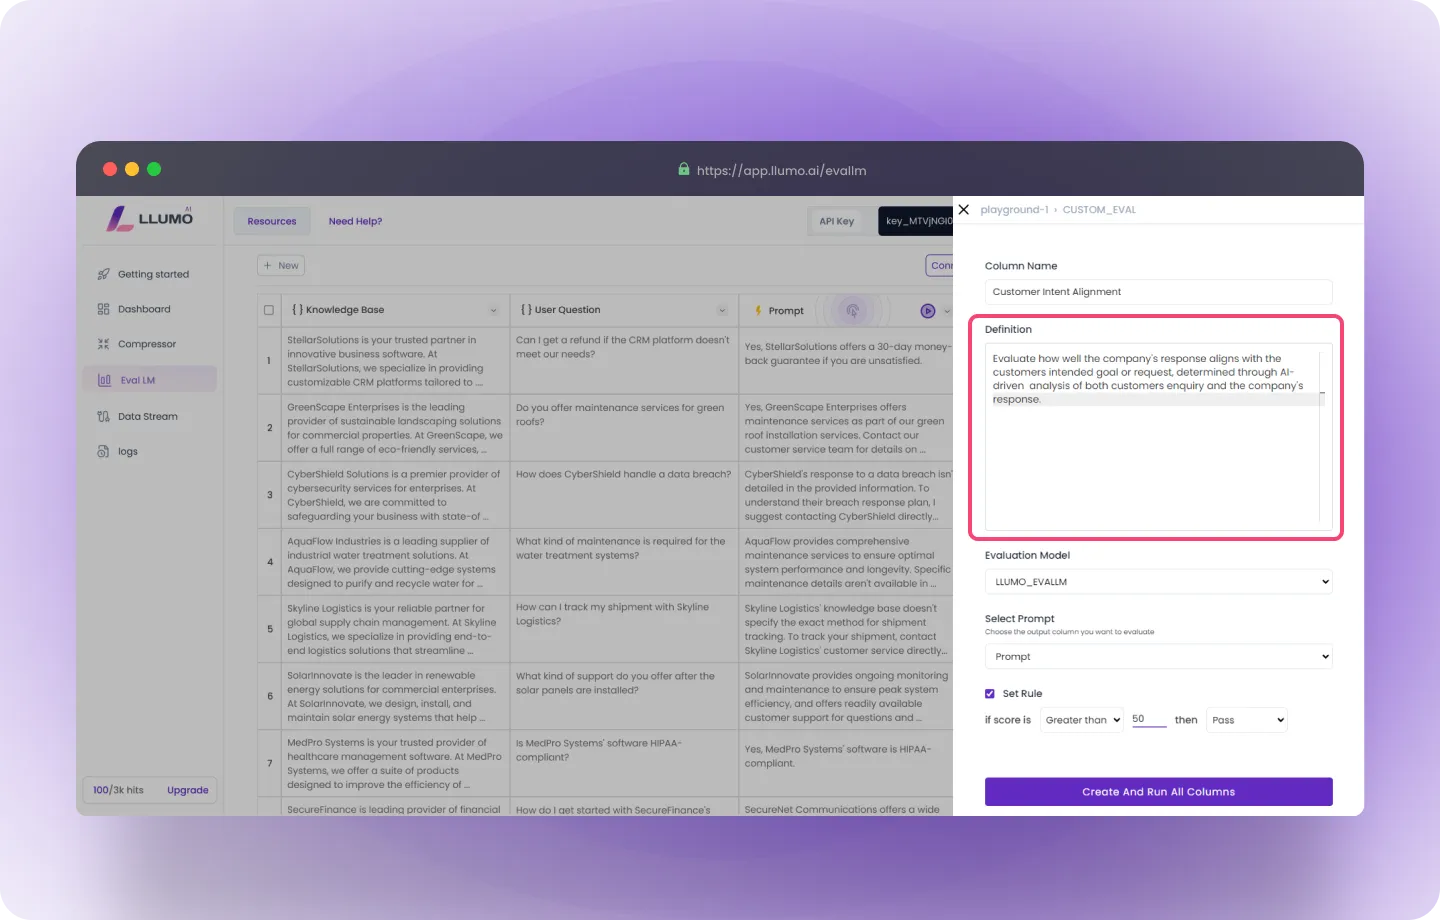
- Select your evaluation model and choose the output column in your dataset that you want to assess. You can experiment with different models and run evaluations on the same prompt to compare their performance, using your custom evaluation metrics to analyze the results.
Step 5: Evaluation Parameters
Set Rule for KPIs: Each KPI allows you to set a specific threshold to define a “pass” or “fail.” Example: For confidence, if the confidence score is more than 50, it passes.Step 6: Run the Evaluation
- Start the Evaluation: After confirming your settings, click the “Create and Run All Columns” button to begin processing your evaluation.
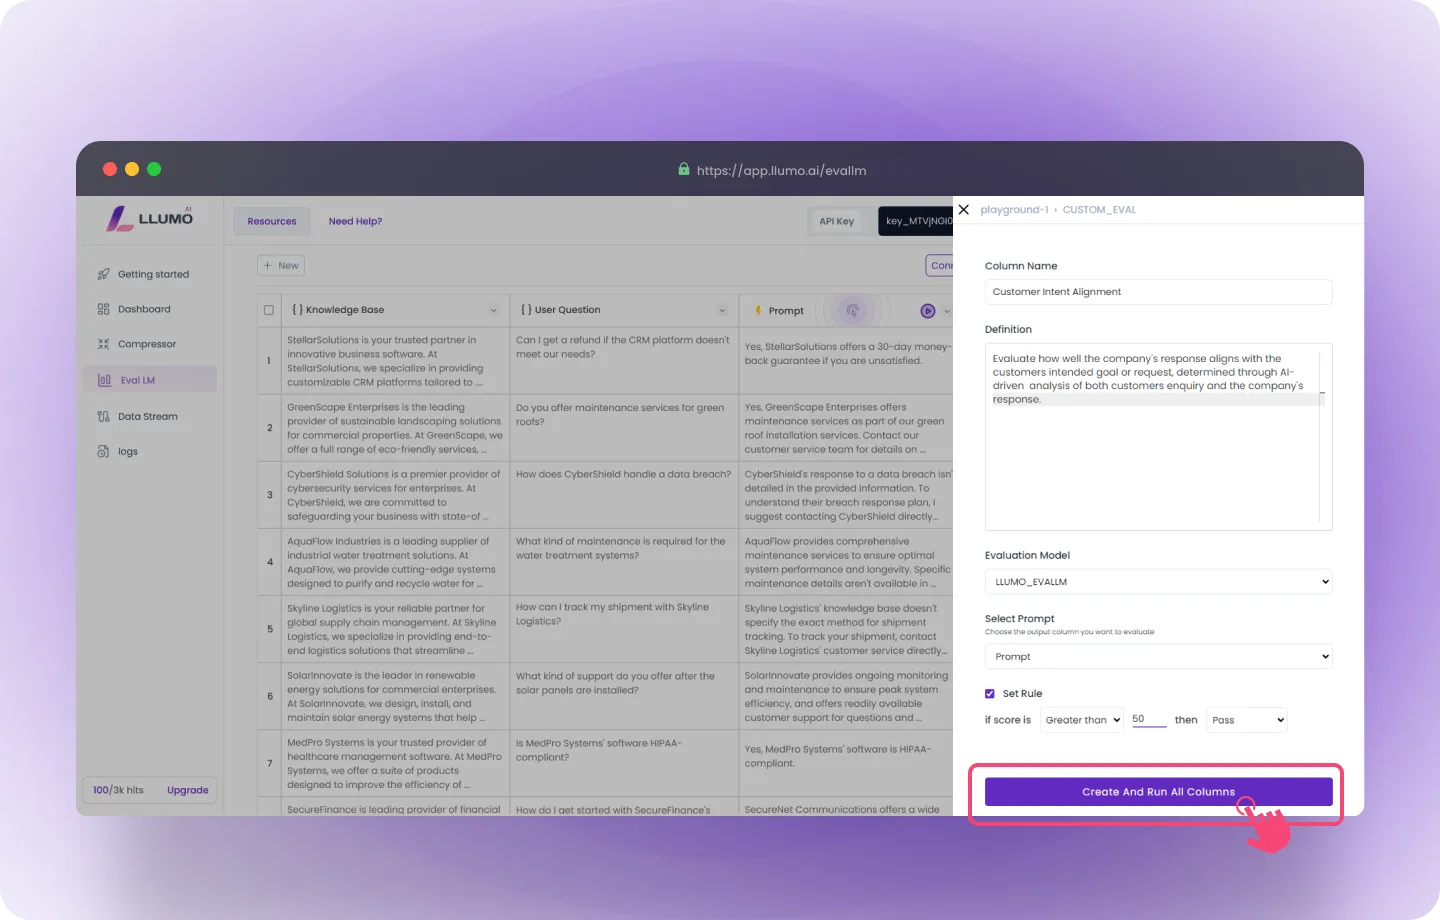
- Review Evaluation Results: The evaluation will return detailed results, including Pass/Fail status for each KPI along with percentage scores.
 Similarly, we can define multiple custom evaluations to evaluate the output.